Two Gluten-Free Chili Recipes

gluten free chili squash spinach black bean mom blogger los angeles

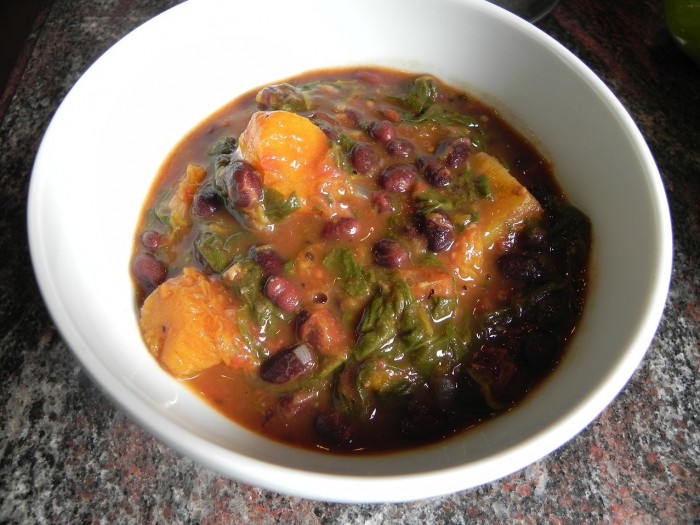
I’ve decided to give up pasta and bread, which has made me start craving my chili. I make butternut squash chili and turkey chili a lot in the winter, but it’s such a good, filling gluten-free dinner I may start making it in the spring, too.

This is the butternut squash recipe, but if you can’t get butternut squash you can use 2 to 3 chopped zuchinni.

Easy Butternut Squash Chili

½ large onion, finely chopped

3 cloves of garlic, crushed

1 can Trader Joe’s Roasted Tomatoes with Green Chile (or 1 4-ounce can of diced green chile and one can roasted tomatoes)

24 ounces butternut squash in cubes

12 ounces spinach

3 cans black beans

Saute the onion and garlic in a tablespoon of olive oil. Once the onions are soft add the tomatoes (or the tomatoes and green chile) and butternut squash. Cook until butternut squash is slightly soft. Add spinach and cook until wilted. Add beans and cook together for at least an hour. I usually transfer to a slow cooker for at least 4 hours. Add salt and pepper to taste. If you like more spice, add ½ teaspoon chili powder. Serve on its own or with shredded sharp cheddar cheese.

Turkey and Black Bean Chili

1 pound ground turkey

3 cloves of garlic, crushed

1/2 a large onion, finely chopped

1 can roasted tomatoes

3 cans of black beans

1 teaspoon to a tablespoon of brown sugar

salt, pepper, and chili powder to taste

Saute the onion and garlic in a tablespoon of olive oil. Once the onions are soft add the tomatoes. Remove from the pan. Add ground turkey to the pan and cook until browned. Transfer the turkey to a slow cooker and add the garlic, onion, and tomato mixture and 3 cans of black beans. Add chili powder and brown sugar to taste and let cook for 4 to 6 hours. Once it’s done add salt and pepper to taste. If you don’t have a slow cooker, cook monitored on the stove top on low. You can add shredded sharp cheddar or jack cheese or diced onions.

 

Gluten-Free Pizza in Los Angeles

pizza gluten free los angeles mom blogger

For a very long time we never went out for pizza. There were just no options. My husband has Celiac and he can’t have gluten plus my kids don’t like it much and I’m very particular.
Then gluten-free became all the rage. Now we can walk to Pitfire Pizza and have gourmet individual gluten-free pizza (I get the steak salad with walnuts and crumbled blue cheese). Or we can go to our favorite pizza place, Fresh Brothers Pizza, in Beverly Hills, which I think has the best gluten-free pizza around. My favorite is the Fresh Momma’s with spinach, garlic, and mushroom. Or we can order gluten-free pizza from Louise’s and have it delivered.

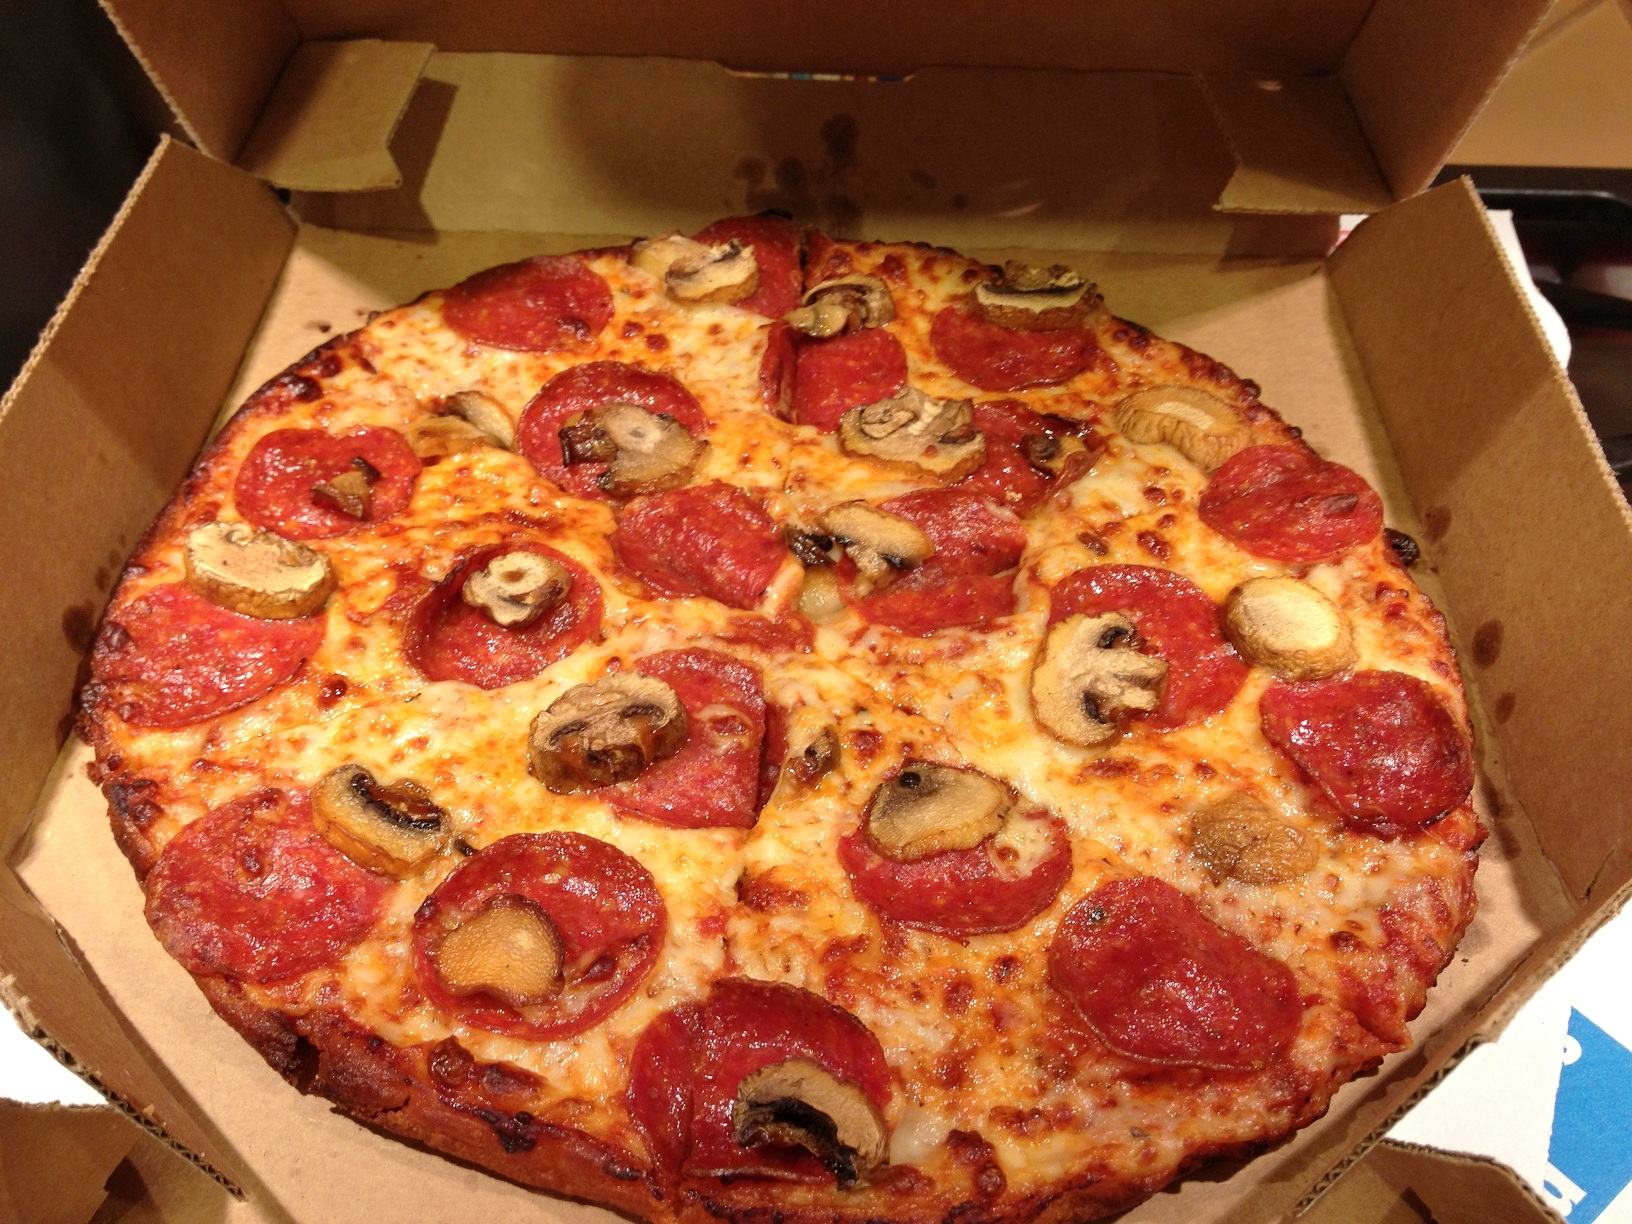
It’s great to have choices and finally, fast food has jumped on the bandwagon. Domino’s Pizza now has a gluten-free option. It’s only available in the small size, but I think it’s great that it’s available at all. It’s carried in most of Domino’s 5,000 stores across the country.

What I find interesting about Domino’s is that the company says the pizza is not recommended for people with Celiac. According to Domino’s “While Domino’s new Gluten Free Crust is appropriate for those with mild gluten sensitivity, Domino’s and the NFCA (National Foundation for Celiac Awareness) do not recommend it for those with celiac disease. Domino’s and the NFCA found that while the crust is certified as gluten free, current store operations at Domino’s cannot guarantee that each handcrafted pizza will be completely free from gluten.”

My husband does not have a mild gluten sensitivity, he has Celiac, but he wanted to try it anyway and take his changes. I thought the pizza was really good and my husband liked it as well. It tasted like Domino’s so it wasn’t gourmet pizza, but it was greasy and cheesy with a flavorful crust. A couple of days later I asked my husband how he felt. Well, he had a reaction to some food he ate and we’re not sure if it was the pizza or something else. Which is probably why Domino’s released this video to be safe.

Eating gluten-free is a challenge, but hopefully more restaurants will give gluten-free options a try.

I was not compensated for this post, but I was given pizza. 

Wikets Recs From the Natural Products Expo West

Wikets new app recommendations

The Natural Products Expo West came to Anaheim in March and I was overwhelmed by all of the great products. I wasn’t sure how I was going to get the word out about everything I saw until I realized it was a great way to use the Wikets app for iPad and iPhone.

Wikets let you recommend, or ‘Rec,” products that you love. I’ve been working with Wikets  for a while and I’m still genuinely into it. It’s a way to get real recommendations to and from real people that you know and trust.

Here are my top 5 recs from the Natural products expo:

1)    Lucy’s Cookies –I was able to meet Dr. Lucy Gibney at the show and she was delightful. More importantly, her gluten free, peanut-free, vegan cookies are delicious. My husband, who has Celiac Disease and can’t have gluten, loves the ginger snaps.

lucy's gluten free cookies
Dr. Lucy Gibney of Lucy’s Gluten-Free Cookies

2)    Udi’s Gluten Free – My boys and I devoured the box of Snickerdoodles I brought home from the show in about a half hour. Udi’s does an amazing job making gluten-free breads, muffins, and cookies taste like great.

3)    Emergen-C Kidz – I’ve been starting my mornings with Emergen-C for months now. It has electrolytes and vitamins, which are a great way to begin each day. I know kids (and adults) should get their vitamins through food, but I like to give my boys a little extra help.

emergen-C Kidz expo west
Emergen-C Kidz at Expo West

4)    Luna Protein Bars – Everything from Clif is good to me, but I especially love the Luna Protein Bars. It’s a great breakfast on the go and it tastes like candy. I just need to make sure I don’t eat it as a second breakfast. It has a lot of protein and calories. I also really liked the new Kit’s Organic Fruit and Nut Bar from Clif, which is just fruit and nuts.

5)    Gluten Freeda – I rec’d the gluten-free Oatmeal, but I very much liked the gluten-free burritos. The tortillas were soft and tasted like wheat flour tortillas. So good.

There were many more products like Begley’s Best Environmentally Friendly products and Julie’s Organics gluten-free ice cream sandwich cookies. Not only that, but there were so many products I never even made it to. It was a huge expo this year.

If you’d like more information about Wikets, visit  http://wikets.com. Wikets isn’t just a great place to find out what to do and where to shop. You can earn points by rec’ing and just by signing up you get double points. I highly recommend you check it out.

This is a sponsored post. The recommendations are not sponsored and these are products I really like. 

Wikets new app recommendations


Blogging. What's That Again?

After years of talking about it, I’ve finally switched over from Blogger to WordPress. I finally have category pages so I can have one blog where I talk about gluten-free, being The White Mexican, and life as a mother in Los Angeles.

I’m so happy with it except for a couple of things. First, there’s no time to write on my new, beautiful blog because I keep fixing things here and there. Plus I’m the editor and co-founder of MomsLA.com and I write for CBS Los Angeles Best of Family. I’ve had posts on both of those sites, but only a couple have made it on my own.

And then there’s the issue of my url. It’s different. I was yvonneinla.blogspot.com for years. Now, I’m yvonneinla.com. Similar, but different. So different I have no traffic, no one to read my fancy new blog. Okay, it’s probably because I haven’t posted as much as I should, but I blame the change.

Oh, change. Because I need to do something drastic in order to change, I’m going to do just that. I’ve done quite a few crazy schemes to get me to follow through on things. For example, I went on a 28-day challenge where I was vegan with no oil or sugar. Why? to give up sugar. I signed up for a 6-month marathon training (twice) so I would exercise regularly, which was great except for running the 2 marathons. Here is my latest crazy scheme; I’m going to post a blog on this site every day for 30 days.

Today is Day 1. Thank you and Welcome to YvonneInLA.com

To Tamale or not to Tamale

I can remember only one time that we had homemade tamales at Christmas. My mom and a couple of her friends got together and made green corn and red chile tamales. They made them once, but complained for years. The tamales took days to make, but minutes for our family to scarf them down.

A couple of years ago, I started a tradition of making tamales for New Year’s Eve. A few of us got together and worked in an assembly line so it wasn’t too bad.But this year, I’m tired of cooking and cleaning and while I’m currently on the mend, I’ve been sick all week. The last thing I want to do is make tamales and clean up the mess. Now I understand what my mom was talking about. She worked and had 4 kids. Making tamales was a time commitment and she had so little time to spare.

Then I read this lovely post on MomsLA about Christina Simon’s New Year’s Eve tradition to make Hoppin’ John (black eyed peas) every year in honor of her late mother.

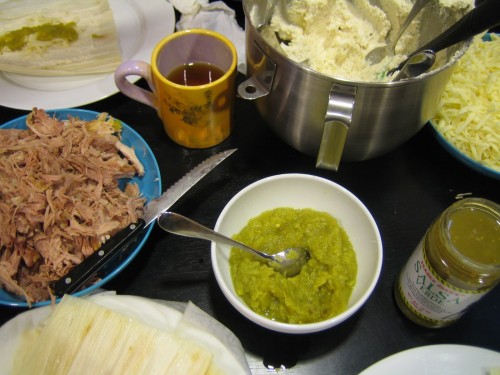
It’s not a tradition if I don’t do it every year. So on Friday, I will soak the corn husks in water and Saturday I’ll make the masa and wait for friends to come over. We’ll spend the afternoon assembling the masa, green chiles, and cheese. We’ll drink coffee and chat. And hopefully next year, in spite of busy schedules and holiday malaise, we’ll do it again.

We Art the 99%, Celiac Disease, and Happy Endings

Things have been very busy over at MomsLA.com where I am editor and cofounder. I haven’t been posting as much at YvonneInLA, something that I hope will change in 2012, but I have been posting other places. For example:

Gluten-Free Tres Leche Cake

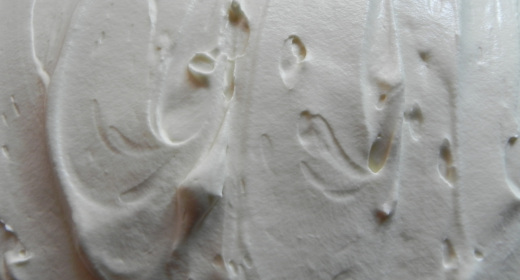
tres leches cake frosting

There are certain things that remind me of Christmas. And they’re not the usual things people think of like Christmas trees and nutmeg. For me, it’s the cold, dry, desert air, family talking very loud in Spanish and English, See’s Candy, and Tres Leche cake.

Every Christmas Day, my family and I would pack ourselves in the car and go to my grandmother’s house in Nogales, Arizona. It was a short drive from Tucson, but we didn’t go often so it was exciting when we did.

My grandmother’s house was on the top of a hill. It had a porch with old squeaky chairs, and a staircase that led up to a shrine of the Virgin of Guadalupe. The house was always dark and as a kid it was a little spooky. After a few years, she stopped hosting and we started going to my Aunt’s house.

It was a drastic contrast; bright and loud with people talking and laughing. The best thing about my Aunt’s house was the food. Or should I say dessert. There was a buffet table with tamales, beans, tortillas, and ham, but there was a smaller table at the end with nothing but treats.

Boxes of See’s Candy, cookies, homemade fudge, and best of all a giant Tres Leche Cake would be spread across the table. I would think about the cake all year. But I never tried to make it. It has not one but tres leche. It sounded way too hard.

I finally decided this was the year I would make it. Most everything I bake is gluten-free so not only did I make the cake for the first time, I made it with rice flour.

It wasn’t quite the same as I remembered it, but it was so, so good. And it wasn’t difficult at all after I realized I needed to plan ahead. It came out sweet, and delicious. Not as light as a Tres Leche Cake with gluten, but good. It’s actually Quatro Leche cake because I put milk in the cake as well.

Gluten-Free Tres Leche Cake

Cake
2 ¾ cup gluten-free flour *
2 teaspoons baking powder
1 teaspoon baking soda
2 teaspoons xantham gum
½ teaspoon salt
2/3 cup butter
1 ¼ cups sugar
2 teaspoons vanilla
3 eggs
1 cup milk

Filling
1 can evaporated milk (12-ounces)
1 can sweetened condensed milk
1 cup half and half
Frosting
2 cups heavy whipping cream
1 cup sugar
1 teaspoon vanilla

Preheat oven to 350°. Spray a 13 by 9 inch baking pan (not glass) with cooking spray. Mix gluten-free flour, baking soda, baking powder, xantham gum, and salt in a small bowl and set aside.

Beat butter for 30 seconds. Add sugar and vanilla and beat until combined. Add eggs one at a time. Beat for 1 minute for each egg. Add 1/3 of the flour mixture alternating with milk until combined.

Spread the batter evenly into prepared pan. Cook for 25 to 30 minutes or until a knife inserted into the center comes out clean.

Cool cake completely in the pan on a rack. Once it’s cool, use a fork or chopstick to poke holes all over the cake. Whisk together the evaporated milk, sweetened condensed milk, and half and half. Pour over the cake. It will look like it’s pooling in the wrong places, but wait a few minutes and it will seep into the cake. Cover with plastic wrap and refrigerate overnight or at least 8 hours.

The next morning or hours later, whip the heaving whipping cream, sugar and vanilla until it forms stiff peaks. Spread over the cake. Serve and enjoy!

I’m sharing my new favorite milk recipe as part of a sponsored campaign with the California Milk Processor’s Board and Latina Mom Bloggers. For more milk recipes and a little dose of #positivismo visit the Master of the Glass Half Full on Facebook or Twitter

*Basic Gluten-Free Flour Mix from the Gluten-Free Gourmet Cooks Fast and Healthy
6 cups white rice flour
2 cups potato starch
1 cup tapioca flour
Store leftover flour in an airtight container

Nothing Says Home Like Flan

Milk, sugar, and vanilla: Three of my favorite things in the world. As a child I wasn’t allowed to have sugar (too gordita!) so of course I thought about it all the time. My mom didn’t make a lot of desserts growing up, but she did make one that combined my three favorite things. Her flan is to die for. It’s milky, sweet, and so rich.

Banana Flan with Fresh Bananas and Salted CaramelFor years I tried to make it myself, but I couldn’t recreate it. It wasn’t dense enough. It wasn’t rich enough. It wasn’t hers. Growing up I hated cooking and would spend my time in the kitchen reading a book until it was time to cut vegetables or grate cheese, not paying attention to what she put into her amazing dishes.

When I asked her how she made her flan she said “It’s just condensed milk, evaporated milk, eggs, and vanilla.” How many eggs? How much condensed milk? Her answer was different every time.

Finally, I got her to look through her recipes (which were just a list of ingredients, no quantities) and write down how she made it. I was blown away by how simple it is; and how bad it is for you! Now I realize why I never could recreate it. I was trying to make a lower fat version. Well, there’s no low fat happening here.

I save her flan for very special occasions. Because I don’t want my boys wondering how I make any of the foods they love, I have them help me when I cook. I want my kids to have that memory of one taste that makes them think of home.

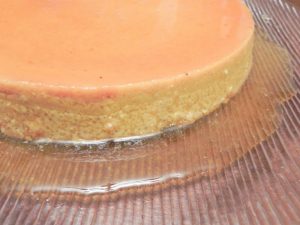
Here is my mom’s recipe for flan, which is easy and decadent. And below is a slightly lower fat, lower sugar Pumpkin Flan recipe that I made for my son’s kindergarten Thanksgiving celebration. It has whole milk, but you can easily substitute low fat milk. And best of all, it’s naturally gluten-free.

Flan de mi Mama en Tucson

1 cup sugar
2 cans sweetened condensed milk (14-ounce cans)
1 can evaporated milk (12-ounces
5 eggs
1 teaspoon good quality vanilla

Preheat oven to 325 and have a 9-inch cake pan ready. Slowly melt 1 cup of sugar in a small saucepan over medium heat until the sugar is completely melted and golden.

CaramelQuickly pour into cake pan and using pot holders, swirl the pan around until the caramel is covering the bottom and about 1 inch up the sides (doesn’t have to be perfect).

In a large bowl, combine the condensed milk, evaporated milk, eggs, and vanilla. Whisk together until smooth. Pour the mixture into the prepared cake pan. Place pan in a larger pan. Slowly add hot water to the larger pan so the water comes up 1 inch on the side of the cake pan. Bake for 35 to 40 minutes or until the custard is set, which is when a knife comes outclean.

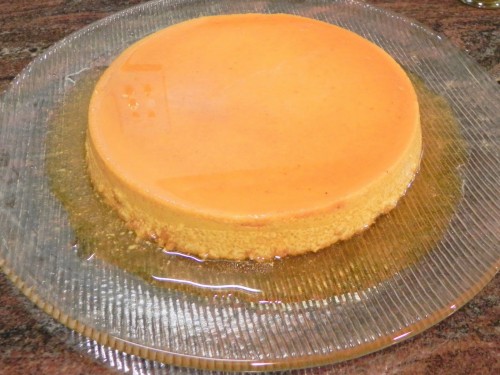
Cool completely and then refrigerate for at least 6 hours or overnight. When it comes time to serve, run a knife along the edge of the panto release the flan. Place a serving plate over the top and flip the flan over very carefully and let the syrup run over the top of the flan. Serve in slices with raspberries just on its own.

Pumpkin FlanMilk in bottle

1 cup sugar
1 can sweetened condensed milk (14-ounces)
1 ½ cups whole milk
1 cup canned pumpkin
6 large eggs
½ teaspoon salt
1 teaspoon cinnamon
1 teaspoon good quality vanilla

Preheat oven to 325 and have a 9-inch cake pan ready. Slowly melt 1 cup of sugar in a small saucepan over medium heat until the sugar is completely melted and golden.

Quickly pour into cake pan and using pot holders, swirl the pan around until the caramel is covering the bottom and about 1 inch up the sides (doesn’t have to be perfect).

In a large bowl, combine condensed milk, milk, pumpkin, eggs, salt, cinnamon, and vanilla. Whisk until the mixture is smooth. Pour the mixture into the prepared cake pan. Place pan in a larger pan. Slowly add hot water to the larger pan so the water comes up 1 inch on the side of the cake pan. Bake for 35 to 40 minutes or until the custard is set, which is when a knife comes out clean.

Cool completely and then refrigerate for at least 6 hours or overnight. When it comes time to serve, run a knife along the edge of the pan to release the flan. Place a serving plate over the top and flip the flan over very carefully and let the syrup run over the top of the flan.

Pumpkin Flan

Want more milk recipes? El Maestrodel Vaso Medio Lleno has them linked on his Facebook page. Or visit the Master of the Glass Half Full onTwitter.

Disclosure: This is post is part of a sponsored campaign with the California Milk Processor’s Board and Latina Mom Bloggers.

Gluten-Free Red Quinoa Dressing with Sage and Browned Butter

My favorite Thanksgiving dish is stuffing. And before myhusband was diagnosed with Celiac Disease, it was his, too. Having Celiac, an autoimmune disorder where gluten attacks your small intestines, means no wheat, barley, or rye. So no stuffing.

Year after year, I’ve tried making gluten-free stuffing, but it wasn’t great. In fact, it wasn’t ever very good. Rice stuffing, gluten-free cornbread stuffing, and the worst, stuffing made with white rice bread just didn’t taste the way stuffing should. They always turned out bland.

But I believe this year will be different. Thanks to SimpleGourmet and a whole lot of browned butter, I made the best stuffing yet. Actually, it doesn’t even compare with my failures of the past. Turns out all I needed to do was take a cooking class.

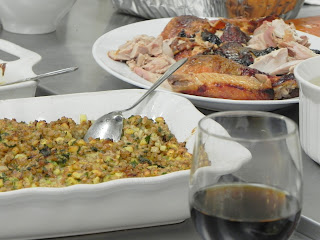
Simple Gourmet in Manhattan Beach invited a group of bloggers to take their Thanksgiving Classics class thanks to the fabulous hostess Debbie Goldberg of Manhattan BeachMomma. It was really fun and very informative. Simple Gourmet foundersMelanie Barsuk and Taji Marie showed us how to make the perfect turkey – Apple-Thyme Roasted Turkey with Creamy Pancetta Gravy – pictured below.


They also made amazing potatoes – Yukon Potato Gratin with Parmesan Rosemary Béchamel – and delicious stuffing, which was Carmelized Parsnipand Farro Dressing with Sage Browned Butter that’s pictured below on the bottom left.

Simple Gourmet’s Thanksgiving dinner


After watching the Simple Gourmets make the food we got to try everything. The turkey was cooked perfectly and the side dishes were very good.

The Farro Dressing was tasty, but Farro is a type of wheat and isn’t gluten-free. Melanie and Taji said quinoa, which is gluten-free, would make a great substitute.

I’m obsessed with red quinoa right now. It’s tasty and easy to make. The class was so inspiring that I decided I needed to get out of my rut of making the same dishes all the time and cook up a trial run of Simple Gourmet’s stuffing, but with quinoa.

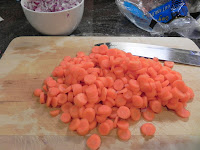
I didn’t have any parsnip or white onion like the recipe called for so I took Melanie and Taji’s advice from the class and used what I had on hand, which was carrots and red onion.

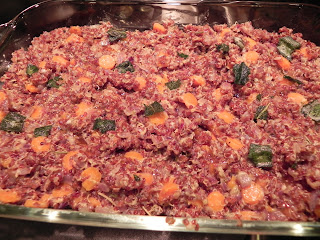
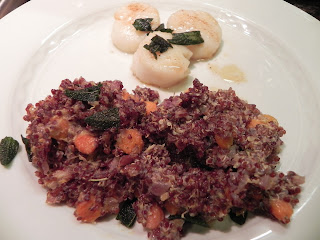
Here is the recipe I came up with and it came out delicious. I have to admit that I made half the recipe, but used the same amount of butter and cheese that you would use for a full recipe. I served it with scallops topped with browned butter and sage.

Gluten-Free Red Quinoa Dressing with Sage and Browned Butter (Adapted from the Simple Gourmet Caramelized Parsnip and Farro Dressing)

3 Tbls butter
1 red onion
4 cups finely diced carrots
1 Tbls fresh chopped thyme
Salt and pepper to taste
6 cups cooked red quinoa (follow directions on the box except sub chicken stock for water)
2 Tbls poultry seasoning
1 egg
1/3 cup chicken stock
½ cup grated parmesan
6 Tbls butter
2 Tbls chopped fresh sage

Melt 3 Tbls butter and add onions, carrots and thyme. Cook for 10 to 15 minutes over medium-high heat until vegetables are soft and beginning to caramelize. Remove and season with salt and pepper. In a large bowl, toss together the quinoa, vegetables, and poultry seasoning. Taste and adjust salt and paper.

In a small bowl, whisk together the egg, stock, and parmesan. Pour the egg mixture over the quinoa and toss to combine.

In a small pan cook 6 Tbls butter and sage over medium heat and cook until golden brown (be careful not to overcook. Can burn easily!). Remove from heat and set aside.

Butter a 9×13 casserole dish and fill with the quinoa mixture. Drizzle brown butter and sage evenly over the quinoa. Cover with foil and bake for 30 minutes. Remove foil and bake for 15 more minutes until golden on top. Serve warm with turkey gravy.
Red Quinoa Dressing with Sage and Browned Butter served with scallops.
(Tip: I’m channeling Paula Dean here, but if you’re making this for Thanksgiving, the more cheese and butter you add the better!)
For more recipes visit Simple Gourmet blog.

Berry and Cherry Smoothie Recipe with Milk and Yogurt

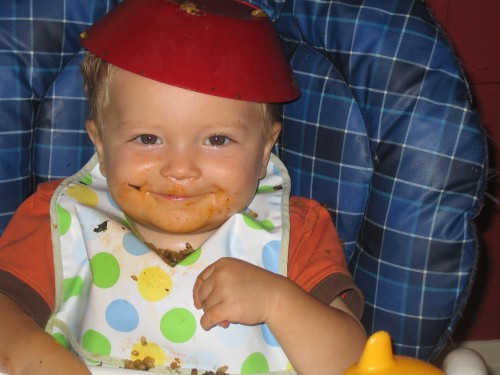
Every once in a while I pull out pictures of my 2 boys as babies. There’s the older one with a bowl of rice and spinach on his head and a big smile on his face. And there’s the younger boy with pureed carrots and peas mashed into his cheeks. See, I tell them, you were so happy when you ate whatever I gave you.

They were the best eaters until one day they weren’t. So I do whatever I can to get healthy food into them. I put peas on their pizza, sprinkle Parmesan cheese on their broccoli, and even put chocolate in their milk.

My younger son drinks milk every day, all the time, but the older one only wants it if it’s doctored in some way. His favorite of course is chocolate milk. I add a tiny bit of chocolate and he drinks it up.

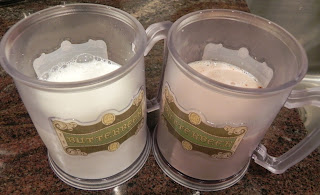
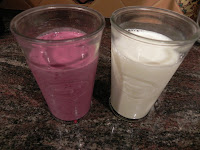
Milk and Chocolate Milk in souvenir Hogsmeade mugs

But the way I love to give him milk is in a smoothie. There’s so much nutrition in their morning smoothie that I don’t have to worry when they go the rest of the day without eating much of anything. There’s no added sugar, just really good ingredients.

He gets protein and calcium from milk and greek yogurt. He gets fiber, antioxidants, and Vitamin C from blackberries, raspberries, and dark sweet cherries. And lastly, he gets potassium from banana or mango. Serve the smoothie with a bowl of oatmeal and you have a power breakfast that kids will love.

We experiment smoothie recipes all the time, but this one is our family favorite. The cherries make it especially delicious.

Mixed Berry with Dark Sweet Cherry Smoothie
2 cups frozen fruit (Trader Joe’s Mixed Berry and Cherry Mix)
1 cup Greek yogurt
1 banana
1 cup milk
1/2 cup mango or orange juice (optional to taste)
Place all of the ingredients in the blender and blend until smooth. Enjoy!

There’s still time to vote for your favorite picture in the Master of the Glass Half Full Photo Contest on Facebook. Follow the Maestro on Facebook or Twitter.

This is a sponsored campaign with the California Milk Processor’s Board and Latina Mom Bloggers.